Onboard developers using internal docs and Port MCP
This guide shows how to onboard a new platform engineer using Cursor and Port MCP. You will connect Notion through Port MCP connectors, register a custom onboarding skill in Port, connect Cursor to Port MCP, and test onboarding questions grounded in your internal documentation.
Common use cases
- Reduced onboarding overhead: Reduce the time engineering teams spend answering repetitive onboarding questions from new hires.
- Standards enforcement: Surface approved scaffolding patterns and deployment processes so engineers follow org standards from day one.
- Architecture discovery: Help engineers understand existing decisions and system designs by querying connected Notion and Port content.
Prerequisites
This guide assumes you have:
- A Port account with the skills blueprint configured.
- Cursor IDE installed (you can also use VSCode, Claude, or other MCP-compatible tools).
- Relevant onboarding content in your knowledge sources - Notion pages and Port Context Lake are both supported.
- A Notion workspace with internal documentation such as an onboarding guide, architecture decision records, and approved tooling pages.
Connect to Notion remote MCP
Connect to the Notion MCP server using Port MCP connector capabilities. You can learn more in MCP connectors.
-
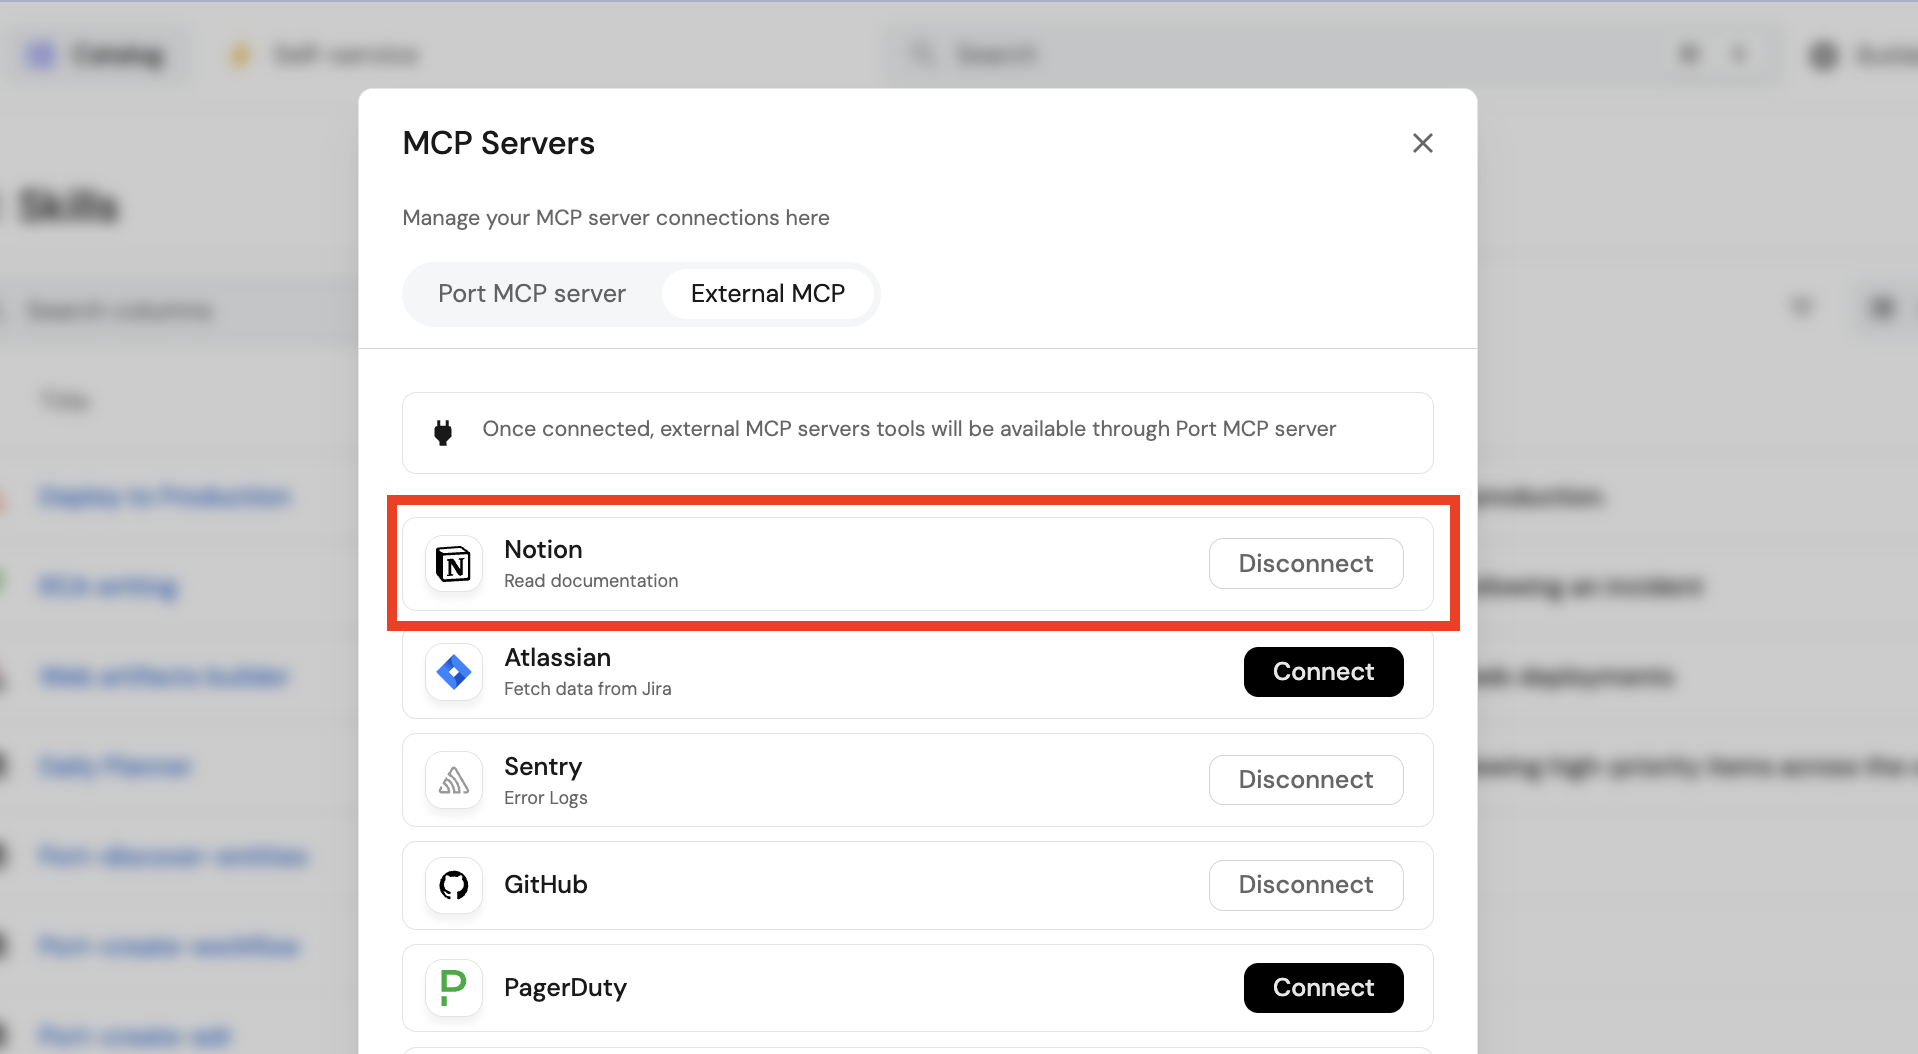
Open the MCP Servers modal and move to the MCP External tab.
-
Click Connect to Notion.
-
Complete the authentication flow for your account.
Create the onboarding skill
Create the skill that will be invoked whenever a developer asks an onboarding question. Ensure you have created the skills blueprint in Port before proceeding.
-
Go to the Skill catalog page in Port.
-
Click the
+ Skillbutton. -
Toggle JSON Mode.
-
Copy and paste this JSON configuration:
Onboarding skill entity (click to expand)
{"identifier": "developer_onboarding_assistant","title": "developer-onboarding-assistant","icon": "Learn","team": [],"properties": {"description": "Answer developer onboarding and internal engineering questions using Notion, Port Context Lake, and connected MCP tools. Use when a developer asks about onboarding, how to do something internally, where to find docs, or what the approved devops patterns are.","instructions": "---\nname: developer-onboarding-assistant\ndescription: Answer developer onboarding and internal engineering questions using Notion, Port Context Lake, and connected MCP tools. Use when a developer asks about onboarding, how to do something internally, where to find docs, or what the approved patterns are.\n---\n\n# Developer onboarding assistant\n\nUse this skill to answer developer questions about internal systems, standards, and workflows.\nAlways ground answers in connected documentation sources (Notion, Port, Context Lake).\nDo not rely on generic knowledge if internal sources are available.\n\n---\n\n## Step 1: Understand the question\n\n1. Parse the user's question and identify:\n\n * **Intent** - onboarding, how-to, architecture, standards, troubleshooting\n * **Key entities** - service name, platform (e.g. OAuth), tool (Port, CI/CD, etc.)\n2. Normalize the query into 2-3 search-friendly phrases:\n\n * e.g.\n\n * \"onboard service port\"\n * \"microservice scaffolding standard\"\n * \"oauth architecture decision record\"\n\n---\n\n## Step 2: Discover available knowledge sources\n\n1. Use `list_entities` on `_mcp_server` where `exposed = true`\n2. Identify available knowledge sources:\n\n * **Notion** - tools like `notion-search`, `notion-fetch`, etc.\n * **Port** - `search_port_knowledge_sources`\n * **Context Lake** - blueprints that may contain internal docs (runbooks, ADRs, guides)\n3. Determine:\n\n * Is **Notion connected and usable**?\n * What **fallback sources** are available?\n\n---\n\n## Step 3: Search Notion (primary source)\n\nIf Notion tools are available:\n\n1. Use `notion-search` (or equivalent) with the normalized queries\n\n * Search across titles + content\n * Prioritize:\n\n * onboarding guides\n * runbooks\n * ADRs (Architecture Decision Records)\n * engineering standards\n\n2. Select the most relevant 1-3 documents:\n\n * Prefer exact matches (service name, platform, workflow)\n * Then semantic matches (related systems or patterns)\n\n3. Use `notion-fetch` (or equivalent) to retrieve full content\n\n4. Extract:\n\n * Key steps and instructions\n * Official patterns or standards\n * Links to related docs\n * Any warnings, prerequisites, or constraints\n\n---\n\n## Step 4: Fallback to Port and Context Lake\n\nIf:\n\n* Notion is **not connected**, OR\n* No relevant documents are found\n\nThen:\n\n1. Use `search_port_knowledge_sources` with the same queries\n2. Additionally, query Context Lake:\n\n * Use `list_entities` on relevant blueprints (e.g. `service`, `runbook`, `adr`, `documentation`)\n * Look for:\n\n * embedded documentation fields\n * related entities (services, systems, components)\n3. Extract any relevant internal guidance\n\n---\n\n## Step 5: Synthesize the answer\n\nProvide a clear, actionable response:\n\n1. **Direct answer first**\n\n * step-by-step if it is a how-to\n * concise explanation if conceptual\n\n2. **Ground in sources**\n\n * Reference the document(s) used (Notion or Port)\n * Prefer linking to the original doc if available\n\n3. **Structure based on intent**\n\n * **How-to** -> steps\n * **Standards** -> rules + rationale\n * **Architecture** -> summary + decisions\n\n4. If multiple sources:\n\n * Merge into a single consistent answer\n * Resolve conflicts (prefer most recent and authoritative)\n\n---\n\n## Step 6: Handle gaps gracefully\n\nIf no strong answer is found:\n\n1. Clearly state:\n\n * No relevant Notion or Port documentation was found\n2. Provide:\n\n * The closest related information (if any)\n3. Suggest next steps:\n\n * Who to ask (team, owner from Context Lake if available)\n * Where to look next (repo, Slack channel, etc.)\n\n---\n\n## Response guidelines\n\n* Be **concise but practical**\n* Prefer **internal truth over general best practices**\n* Always **prioritize Notion -> then Port -> then Context Lake**\n* Never hallucinate internal processes - if unsure, say so\n* Include **links to source documents** when available\n\n---\n\n## Example queries this skill handles\n\n* How do I onboard a new service into Port?\n* What's the approved way to scaffold a new microservice?\n* Where are the OAuth architecture decision records?\n* How do we handle secrets management in this org?\n* What's the deployment process for backend services?\n"},"relations": {}} -
Click
Registerto add the new skill.
Set up Port MCP server in Cursor
The Port MCP server enables you to interact with Port data and connected tools using natural language queries directly from your IDE.
Use Port's remote MCP server for new connections. The Docker image and uvx mcp-server-port package from the deprecated local MCP server repository are no longer maintained. If you used that server, remove its entry from your client's MCP configuration and follow the setup below.
Select your client and Port region, then follow one setup path. Use the EU endpoint (https://mcp.port.io/v1) for app.port.io, or the US endpoint (https://mcp.us.port.io/v1) for app.us.port.io.
Cursor, VS Code, GitHub Copilot CLI, and Claude Code can connect directly over HTTP. The mcp-remote package is a local compatibility proxy for clients that need it; it connects to the same remote Port server and is separate from the deprecated Docker/uvx server.
- Cursor
- VS Code
- GitHub Copilot CLI
- Claude AI
- Claude Code (CLI)
- Codex CLI
To connect Cursor to Port's remote MCP, follow these steps:
For the EU region, you can use the Cursor install link and continue with authentication in step 3. For the US region, or to configure the connection manually, follow all steps below.
-
Open Cursor settings
In the settings, click Customize, select MCPs, and then click New MCP Server.

-
Configure the MCP server
Add the following configuration:
{"mcpServers": {"port-eu": {"url": "https://mcp.port.io/v1","headers": {"x-read-only-mode": "0"}}}}US regionIf your Port organization is in the US region, replace
https://mcp.port.io/v1withhttps://mcp.us.port.io/v1.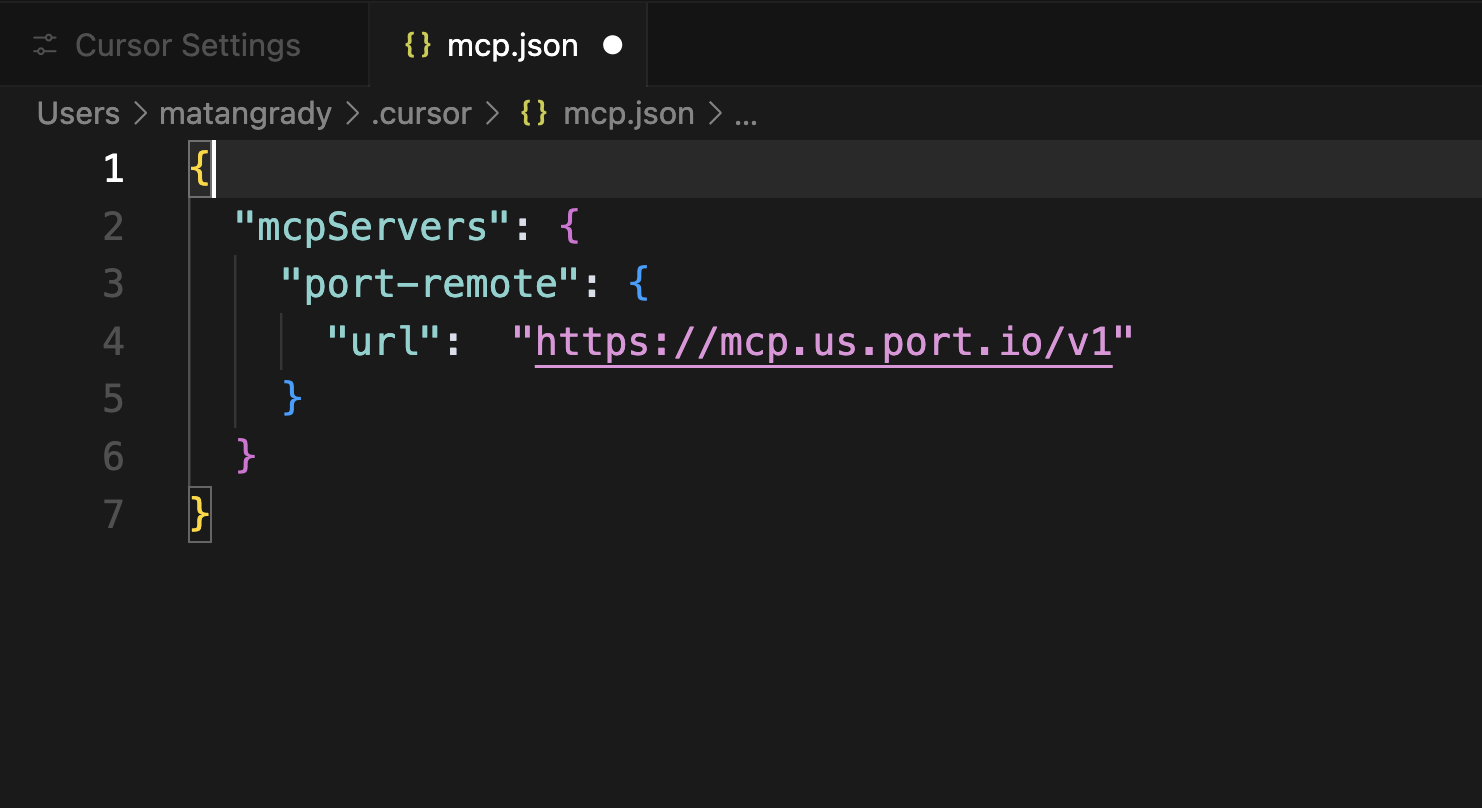 Read-only mode
The
x-read-only-modeheader defaults to0, which allows all tools based on your permissions. You can change it to1to restrict the MCP server to only expose read-only tools. When set to1, write tools are completely hidden from the available tools list, ensuring you can only query data without making modifications. -
Authenticate with Port
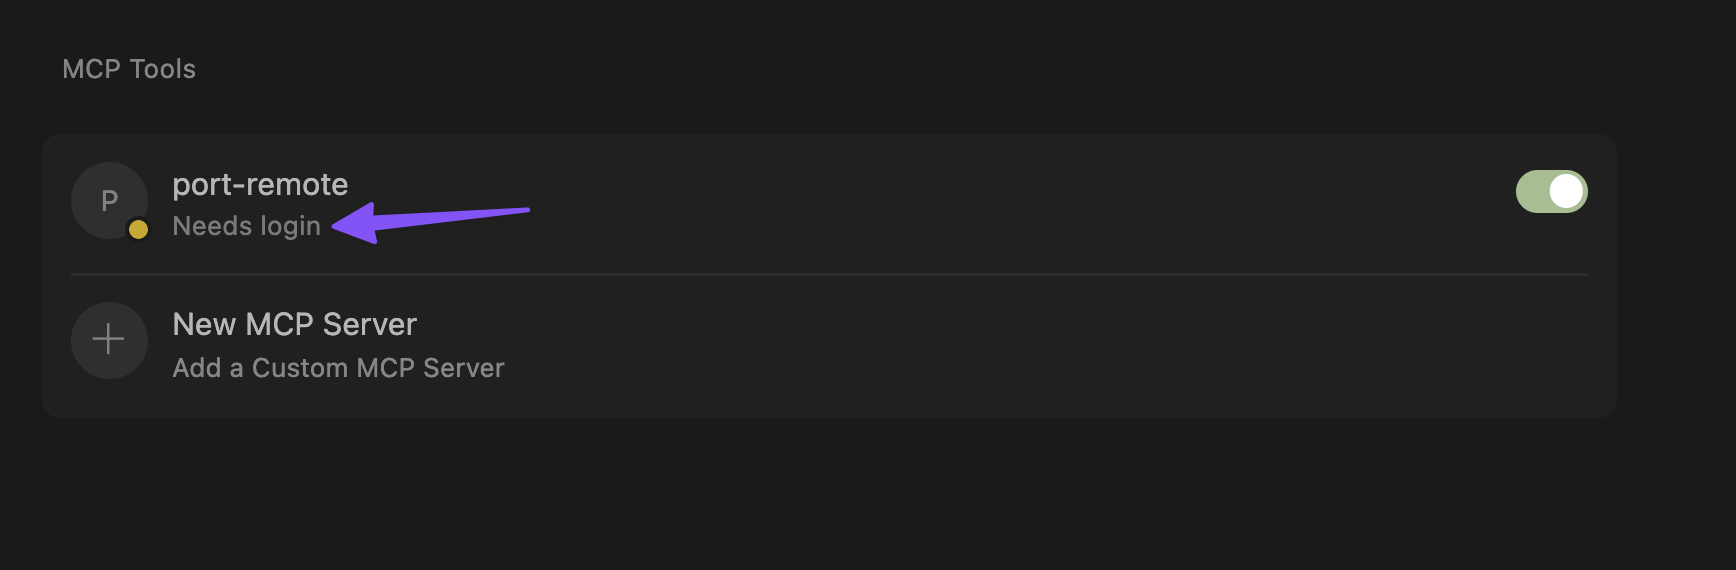
Click on "Needs login" and complete the authentication flow in the window that opens.
 Cursor OAuth session persistence
Port MCP authentication works on the initial connection. If Cursor prompts you to re-authenticate every day or two, this is typically caused by a known Cursor OAuth issue rather than a Port-side session or configuration problem.
When Cursor refreshes your OAuth session, it may fail to persist or update tokens correctly. This is especially common when you have multiple Cursor windows open. Port's logs may show
invalid_granterrors when Cursor attempts to refresh with a stale token.For more details and workarounds, see these Cursor community discussions:
-
Cursor does not refresh OAuth access tokens for MCP servers.
-
OAuth MCPs still require daily re-auth on 3.3.30, multi-window token store not synced.
Cursor has reported fixes for some MCP OAuth issues in stable releases after May 12, 2026. If you experience frequent re-authentication, update Cursor to the latest stable version and check whether the issue persists.
-
-
Verify connection
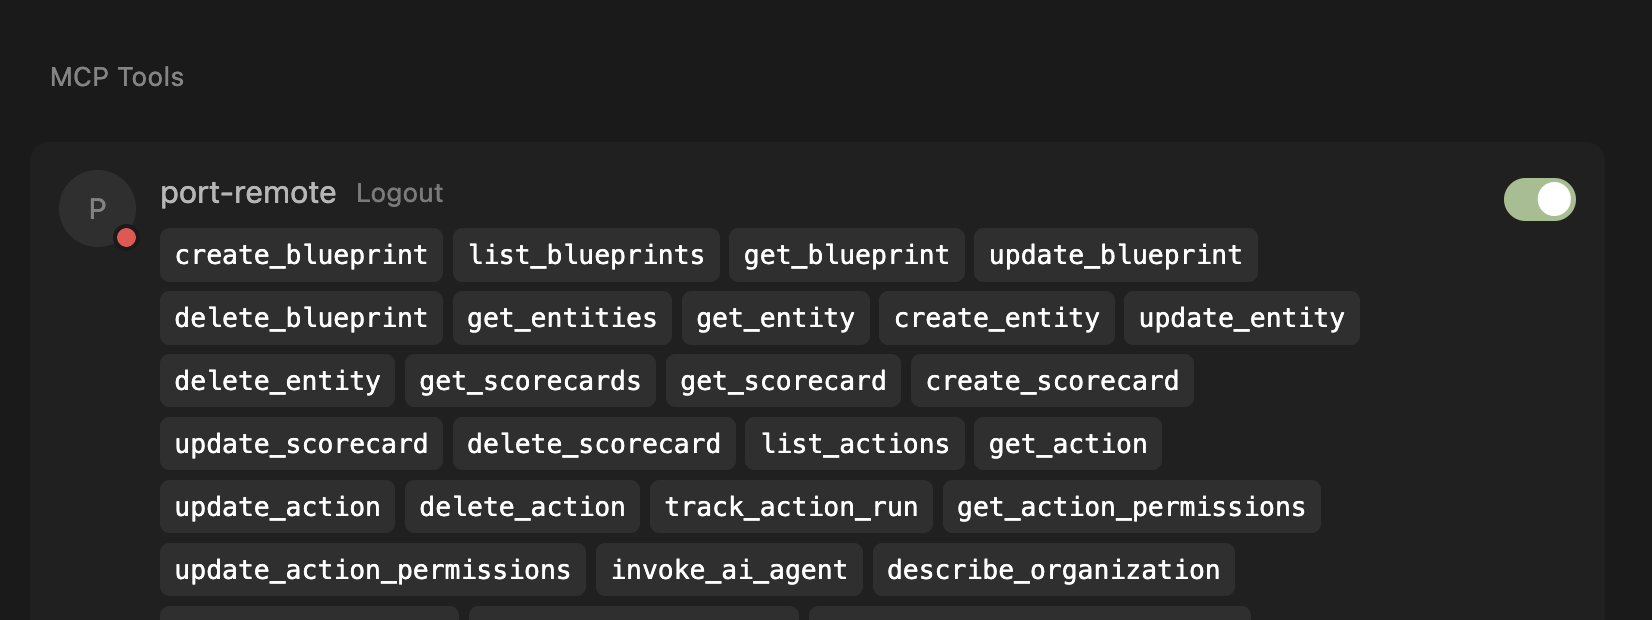
After successful authentication, you'll see the list of available tools from the MCP server.
Connect VS Code directly to Port's remote MCP server over HTTP. Use a current VS Code version with MCP access enabled by your organization. This setup does not require Node.js or mcp-remote. See the VS Code MCP documentation for client requirements.
-
Open the Command Palette and run MCP: Open User Configuration.
-
Add the following configuration to
mcp.json. If you already have aserversobject, add the Port entry to it:{"servers": {"port-vscode-eu": {"type": "http","url": "https://mcp.port.io/v1","headers": {"x-read-only-mode": "0"}}}}US regionIf your Port organization is in the US region, replace
https://mcp.port.io/v1withhttps://mcp.us.port.io/v1.Set
x-read-only-modeto1if you want to expose only read-only tools. The default,0, allows tools based on your Port permissions. -
Save the file, click Start above the Port server entry, and complete the browser authentication flow.
-
Verify that VS Code displays the available tools. Open a chat and select Port tools from the tool picker. Try asking, "List my Port blueprints."
If the connection fails, run MCP: List Servers, select your Port server, and choose Show Output to inspect the error. Check that your configuration uses the correct regional endpoint and that you completed browser authentication.
Connect GitHub Copilot CLI directly to Port's remote MCP server over HTTP. See the GitHub Copilot CLI MCP documentation for client requirements.
-
Add the following configuration to
mcp-config.json. If you already have anmcpServersobject, add the Port entry to it:{"mcpServers": {"port-copilot-eu": {"tools": ["*"],"type": "http","url": "https://mcp.port.io/v1","headers": {"x-read-only-mode": "0"}}}}US regionIf your Port organization is in the US region, replace
https://mcp.port.io/v1withhttps://mcp.us.port.io/v1.Set
x-read-only-modeto1if you want to expose only read-only tools. The default,0, allows tools based on your Port permissions.OAuth redirect portGitHub Copilot CLI uses CIMD (Client ID Metadata) authorization and expects OAuth callbacks on port
33418. If you get an error likeunauthorized_client: Callback URL mismatch, add anauthblock withredirectPortset to33418inside your Port server entry:"auth": {"redirectPort": 33418} -
Start Copilot CLI, run
/mcp, select your Port server, and complete the browser authentication flow. -
Verify that Copilot CLI displays the available Port tools. Try asking, "List my Port blueprints."
If authentication fails, check that your configuration uses the correct regional endpoint and that you completed browser authentication.
To connect Claude AI (Desktop & Web) to Port's remote MCP, install the Port official connector from the Claude connectors library. For detailed instructions, refer to the official Anthropic documentation on custom connectors.
- Direct install link: Install Port connector in Claude.
-
Open Port Connector page by visiting this link or searching for "Port" connector, and click Connect.
-
Enter your MCP server URL when prompted:
https://mcp.port.io/v1US regionIf your Port organization is in the US region, use
https://mcp.us.port.io/v1instead.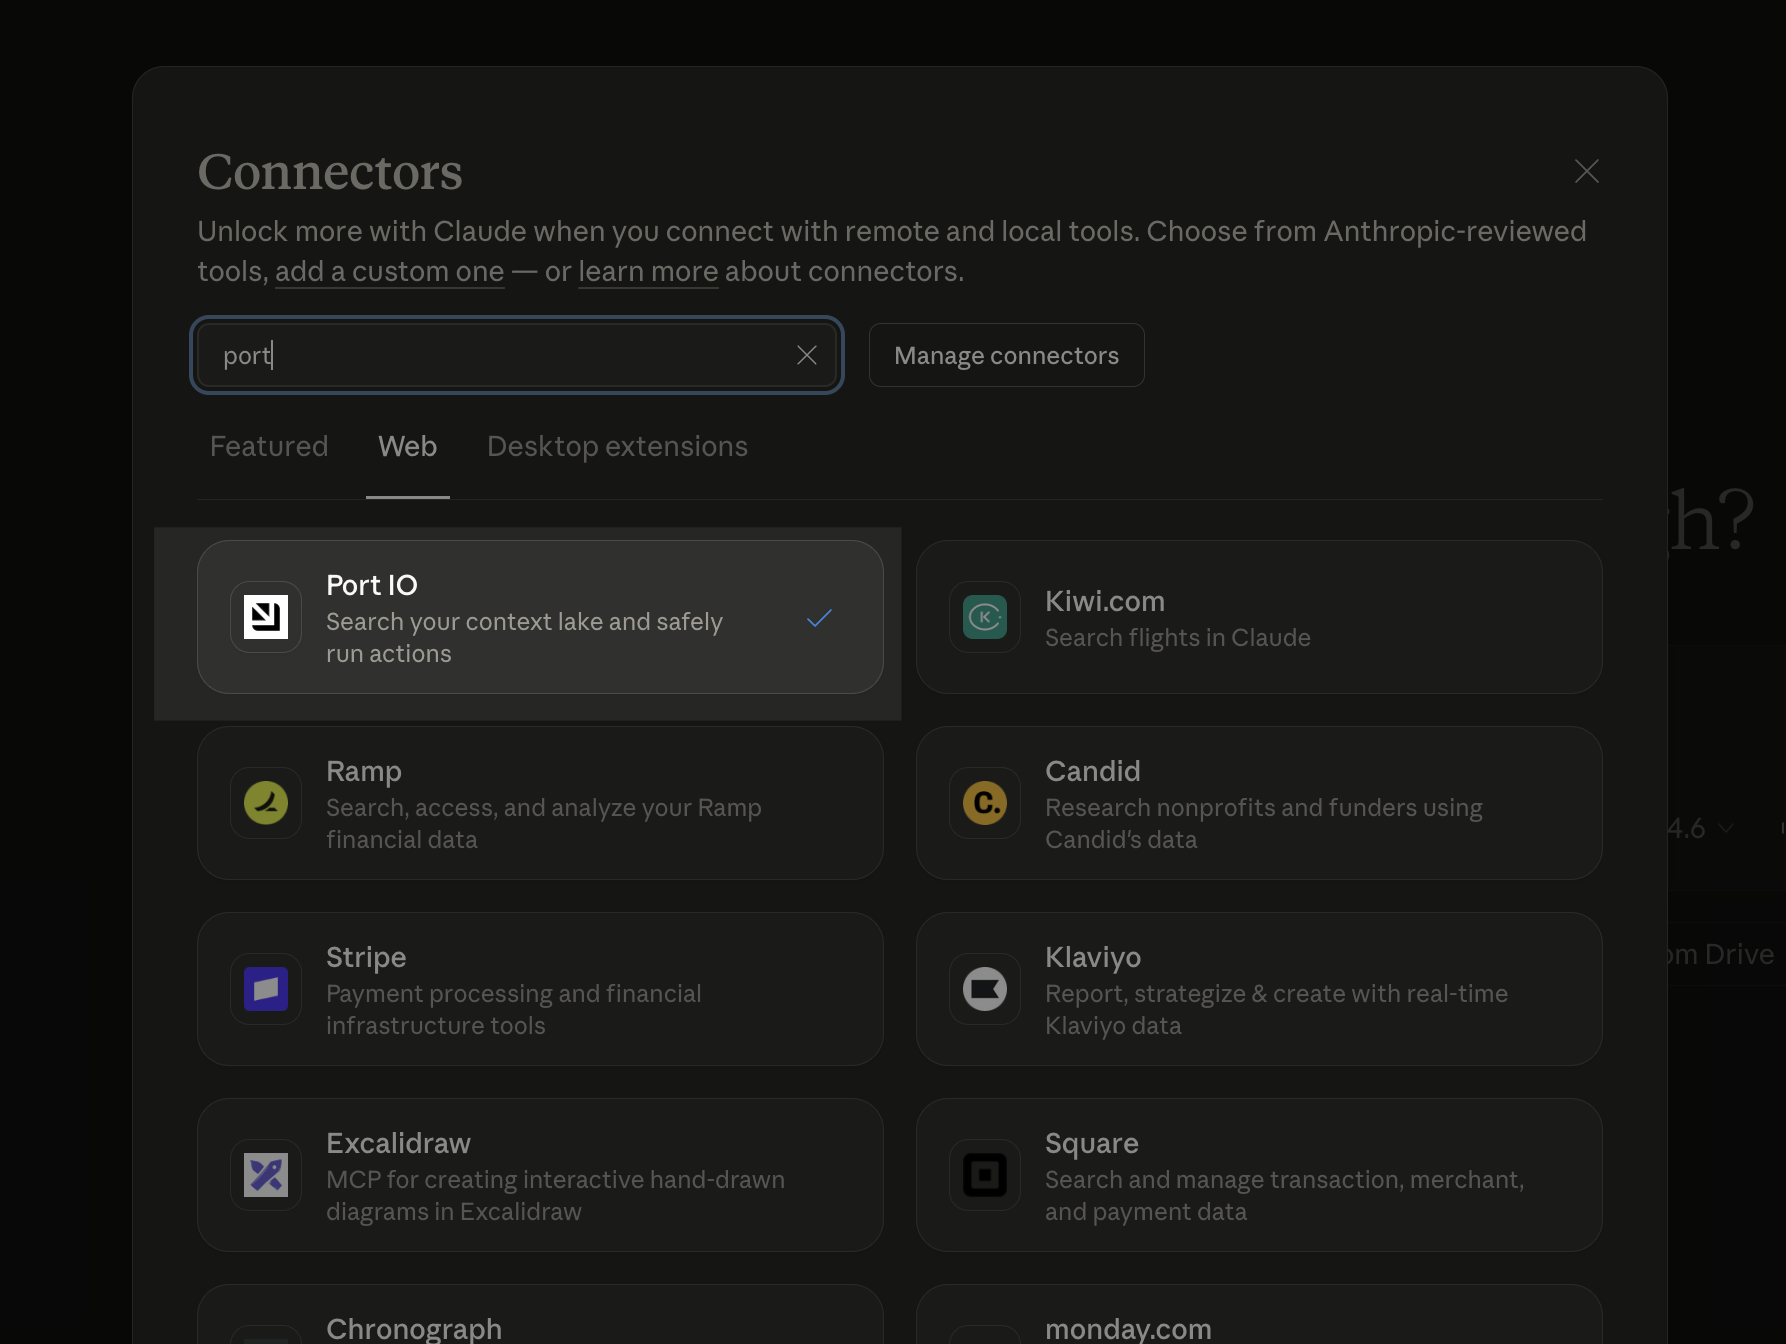
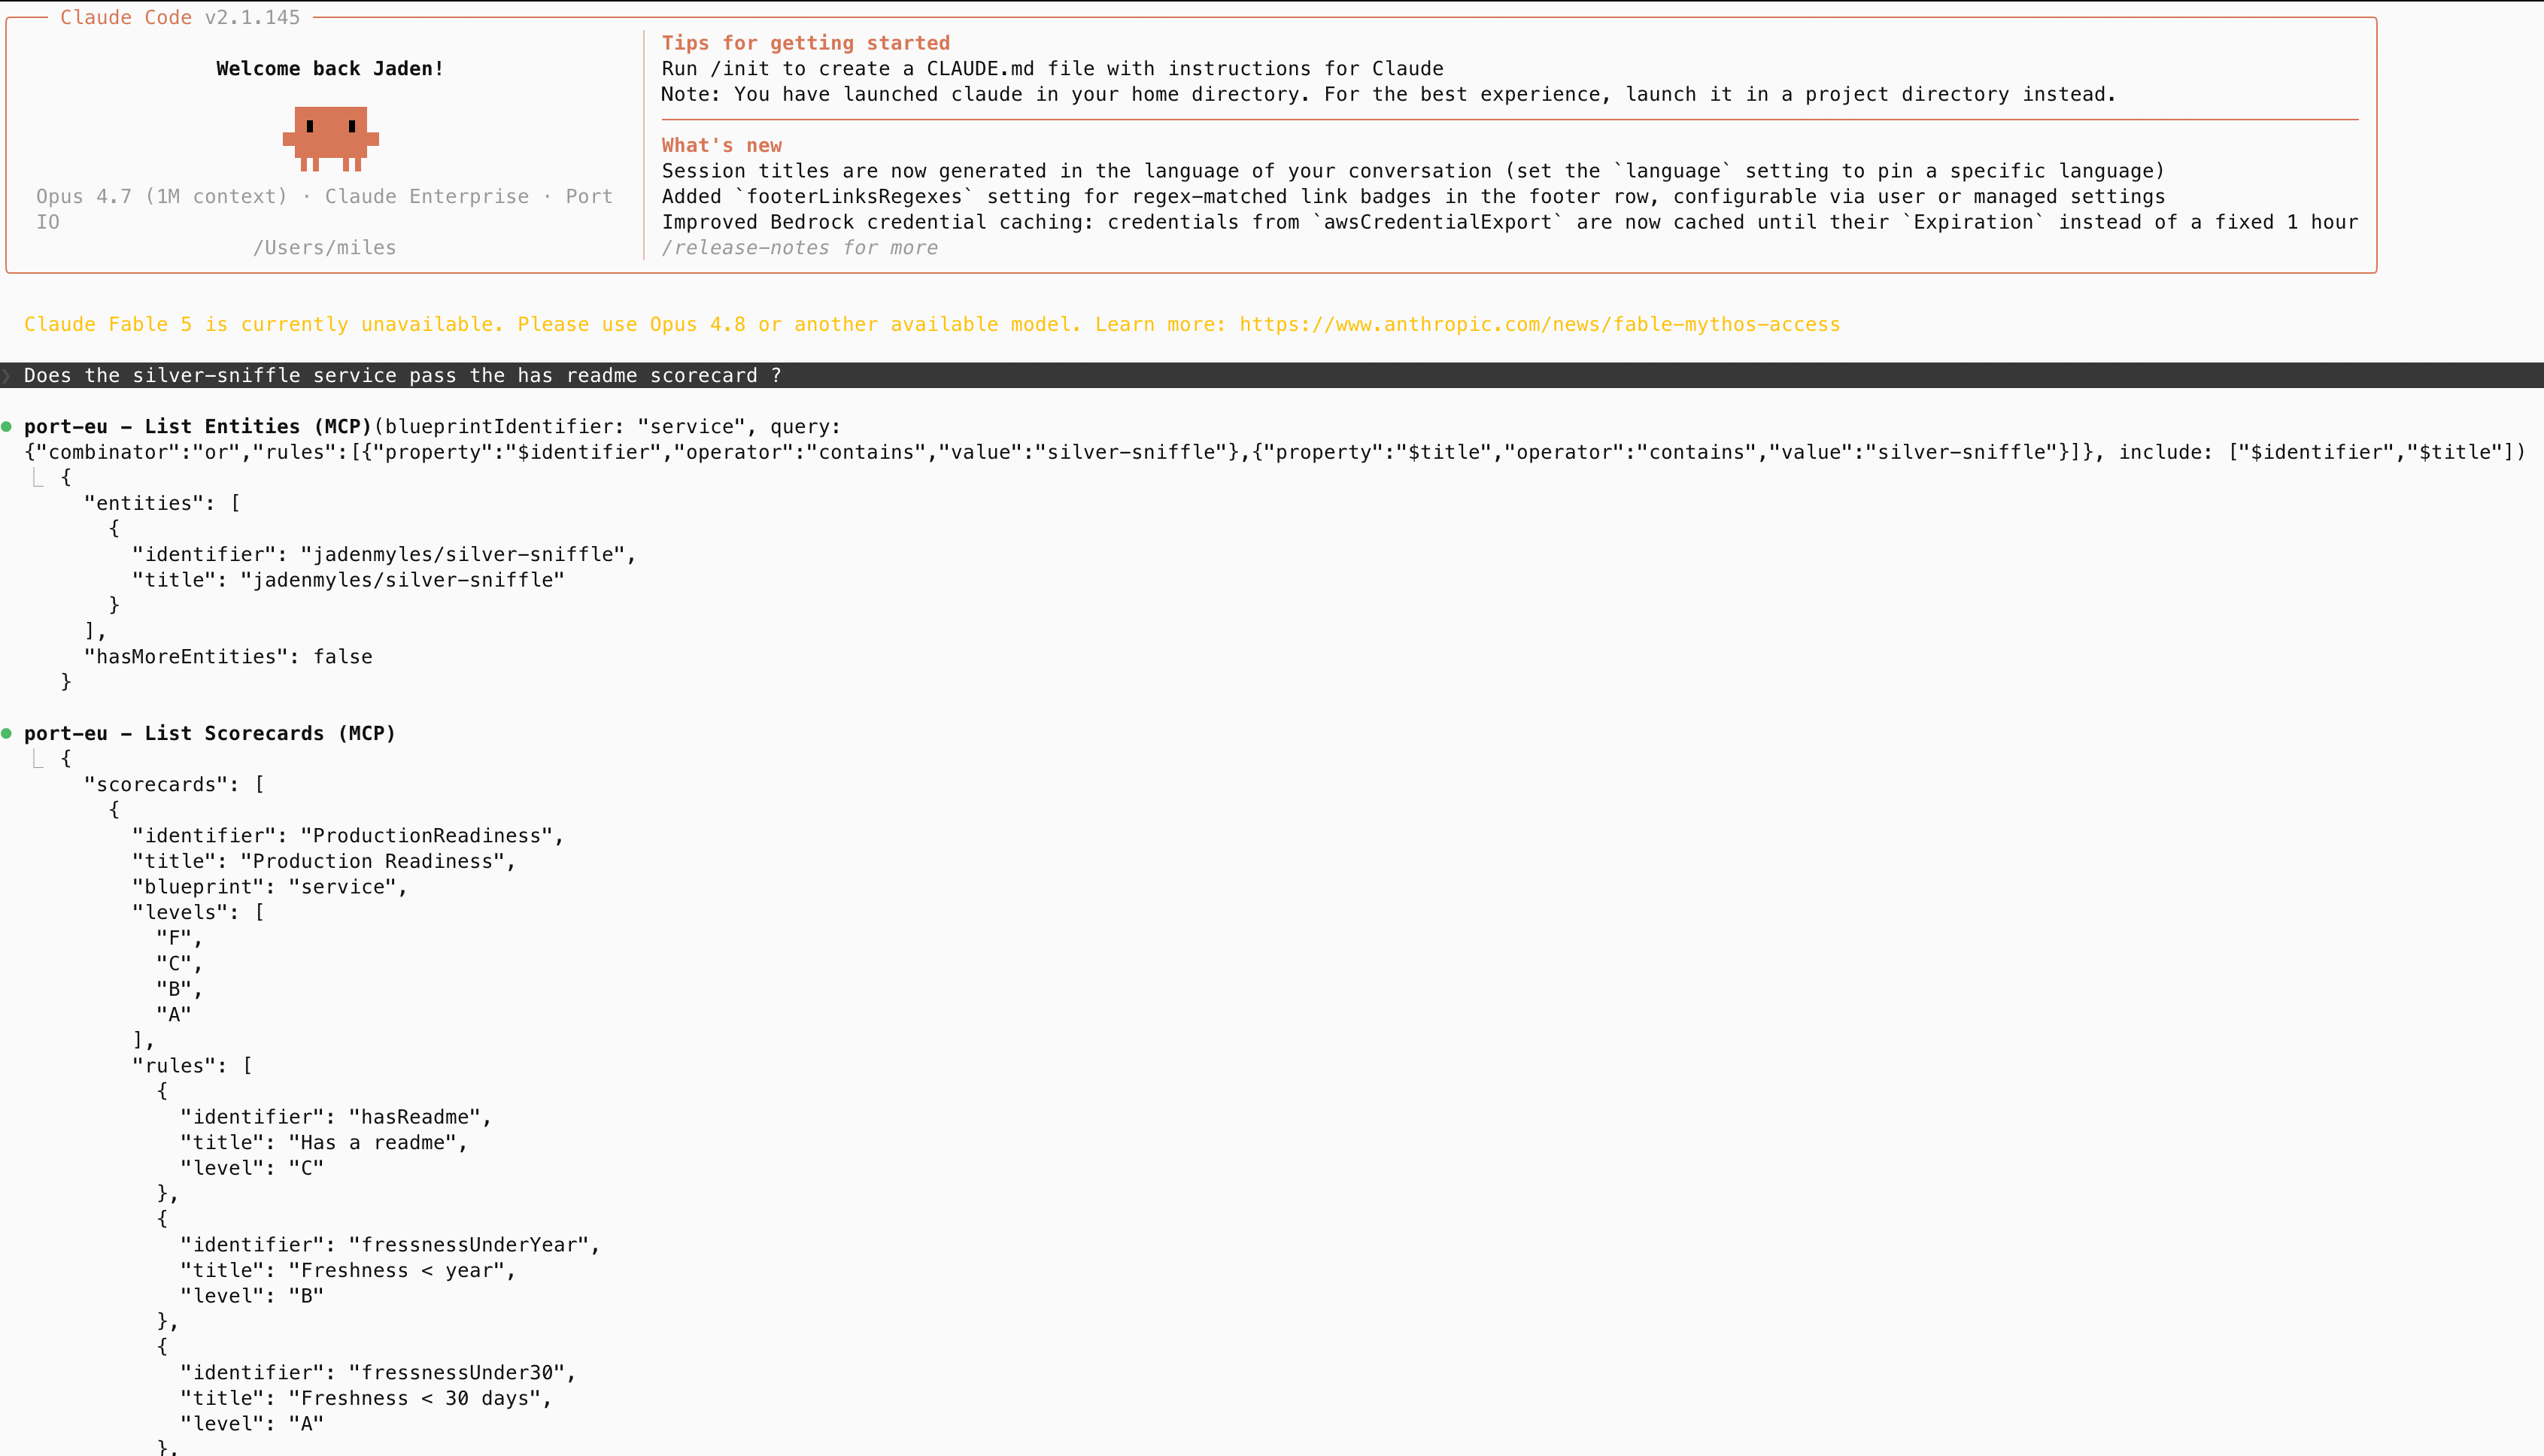
Connect Claude Code directly to Port's remote MCP server using HTTP. This is the recommended setup and does not require Node.js, npx, or a local MCP server.
Prerequisites
- Claude Code CLI installed on your machine. For installation instructions, refer to the official Claude Code documentation.
- Access to your Port account in the browser for OAuth authentication.
Add Port MCP
Run the following command from the directory where you use Claude Code:
claude mcp add --transport http port-eu https://mcp.port.io/v1 --header "x-read-only-mode: 0"
If your Port organization is in the US region, replace port-eu and https://mcp.port.io/v1 with port-us and https://mcp.us.port.io/v1.
The x-read-only-mode header defaults to 0, which allows all tools based on your permissions. Change it to 1 to restrict the MCP server to only expose read-only tools. When set to 1, write tools are completely hidden from the available tools list, ensuring you can only query data without making modifications.
Verify the connection
Start Claude Code:
claude
Run /mcp, select port-eu or port-us, and follow the browser authentication flow. After authentication, verify that the server shows its available tools. Try asking, "List my Port blueprints."
Resolve connection timeouts
If you previously used claude mcp add-json with npx mcp-remote, that configuration starts a local proxy. On first use, npx may need to download the package and its dependencies, adding startup time. The proxy also waits for browser authentication. Package registry access, proxy settings, or an incomplete login can cause this path to time out even when direct HTTP works.
Remove the old Port server entry from your MCP configuration before adding the direct HTTP connection above. If the direct connection also times out, check your region, access to the MCP endpoint from your terminal, and completion of the browser login. Use /mcp to inspect the connection status. See the Claude Code MCP documentation for connection diagnostics and startup timeout settings.
To connect OpenAI Codex CLI to Port's remote MCP server, install Codex CLI locally and add Port as a remote MCP server. For complete instructions, refer to the official Codex CLI documentation.
Prerequisites
- An OpenAI account with access to Codex CLI.
- The Codex CLI installed on your machine.
- Access to your Port account in the browser for OAuth authentication.
- Your Port region. If your Port app URL contains
us, use the US MCP URL. Otherwise, use the EU MCP URL. - Node.js installed on your machine.
Step 1: Install Codex CLI
Run the following command to install Codex CLI:
npm install -g @openai/codex
After installation, verify that Codex CLI is available:
codex --version
Step 2: Sign in to Codex
Start Codex and complete the sign-in flow:
codex
Step 3: Add Port MCP
Run the following command:
codex mcp add port-eu --url https://mcp.port.io/v1
If your Port organization is in the US region, replace port-eu and https://mcp.port.io/v1 with port-us and https://mcp.us.port.io/v1.
Step 4: Authenticate with Port
After adding the server, authenticate using OAuth. Run the matching login command for the region you used in step 3:
codex mcp login port-eu
If you used port-us in step 3, run codex mcp login port-us instead.
Complete the Port authentication flow in the browser window that opens.
Step 5: Verify the connection
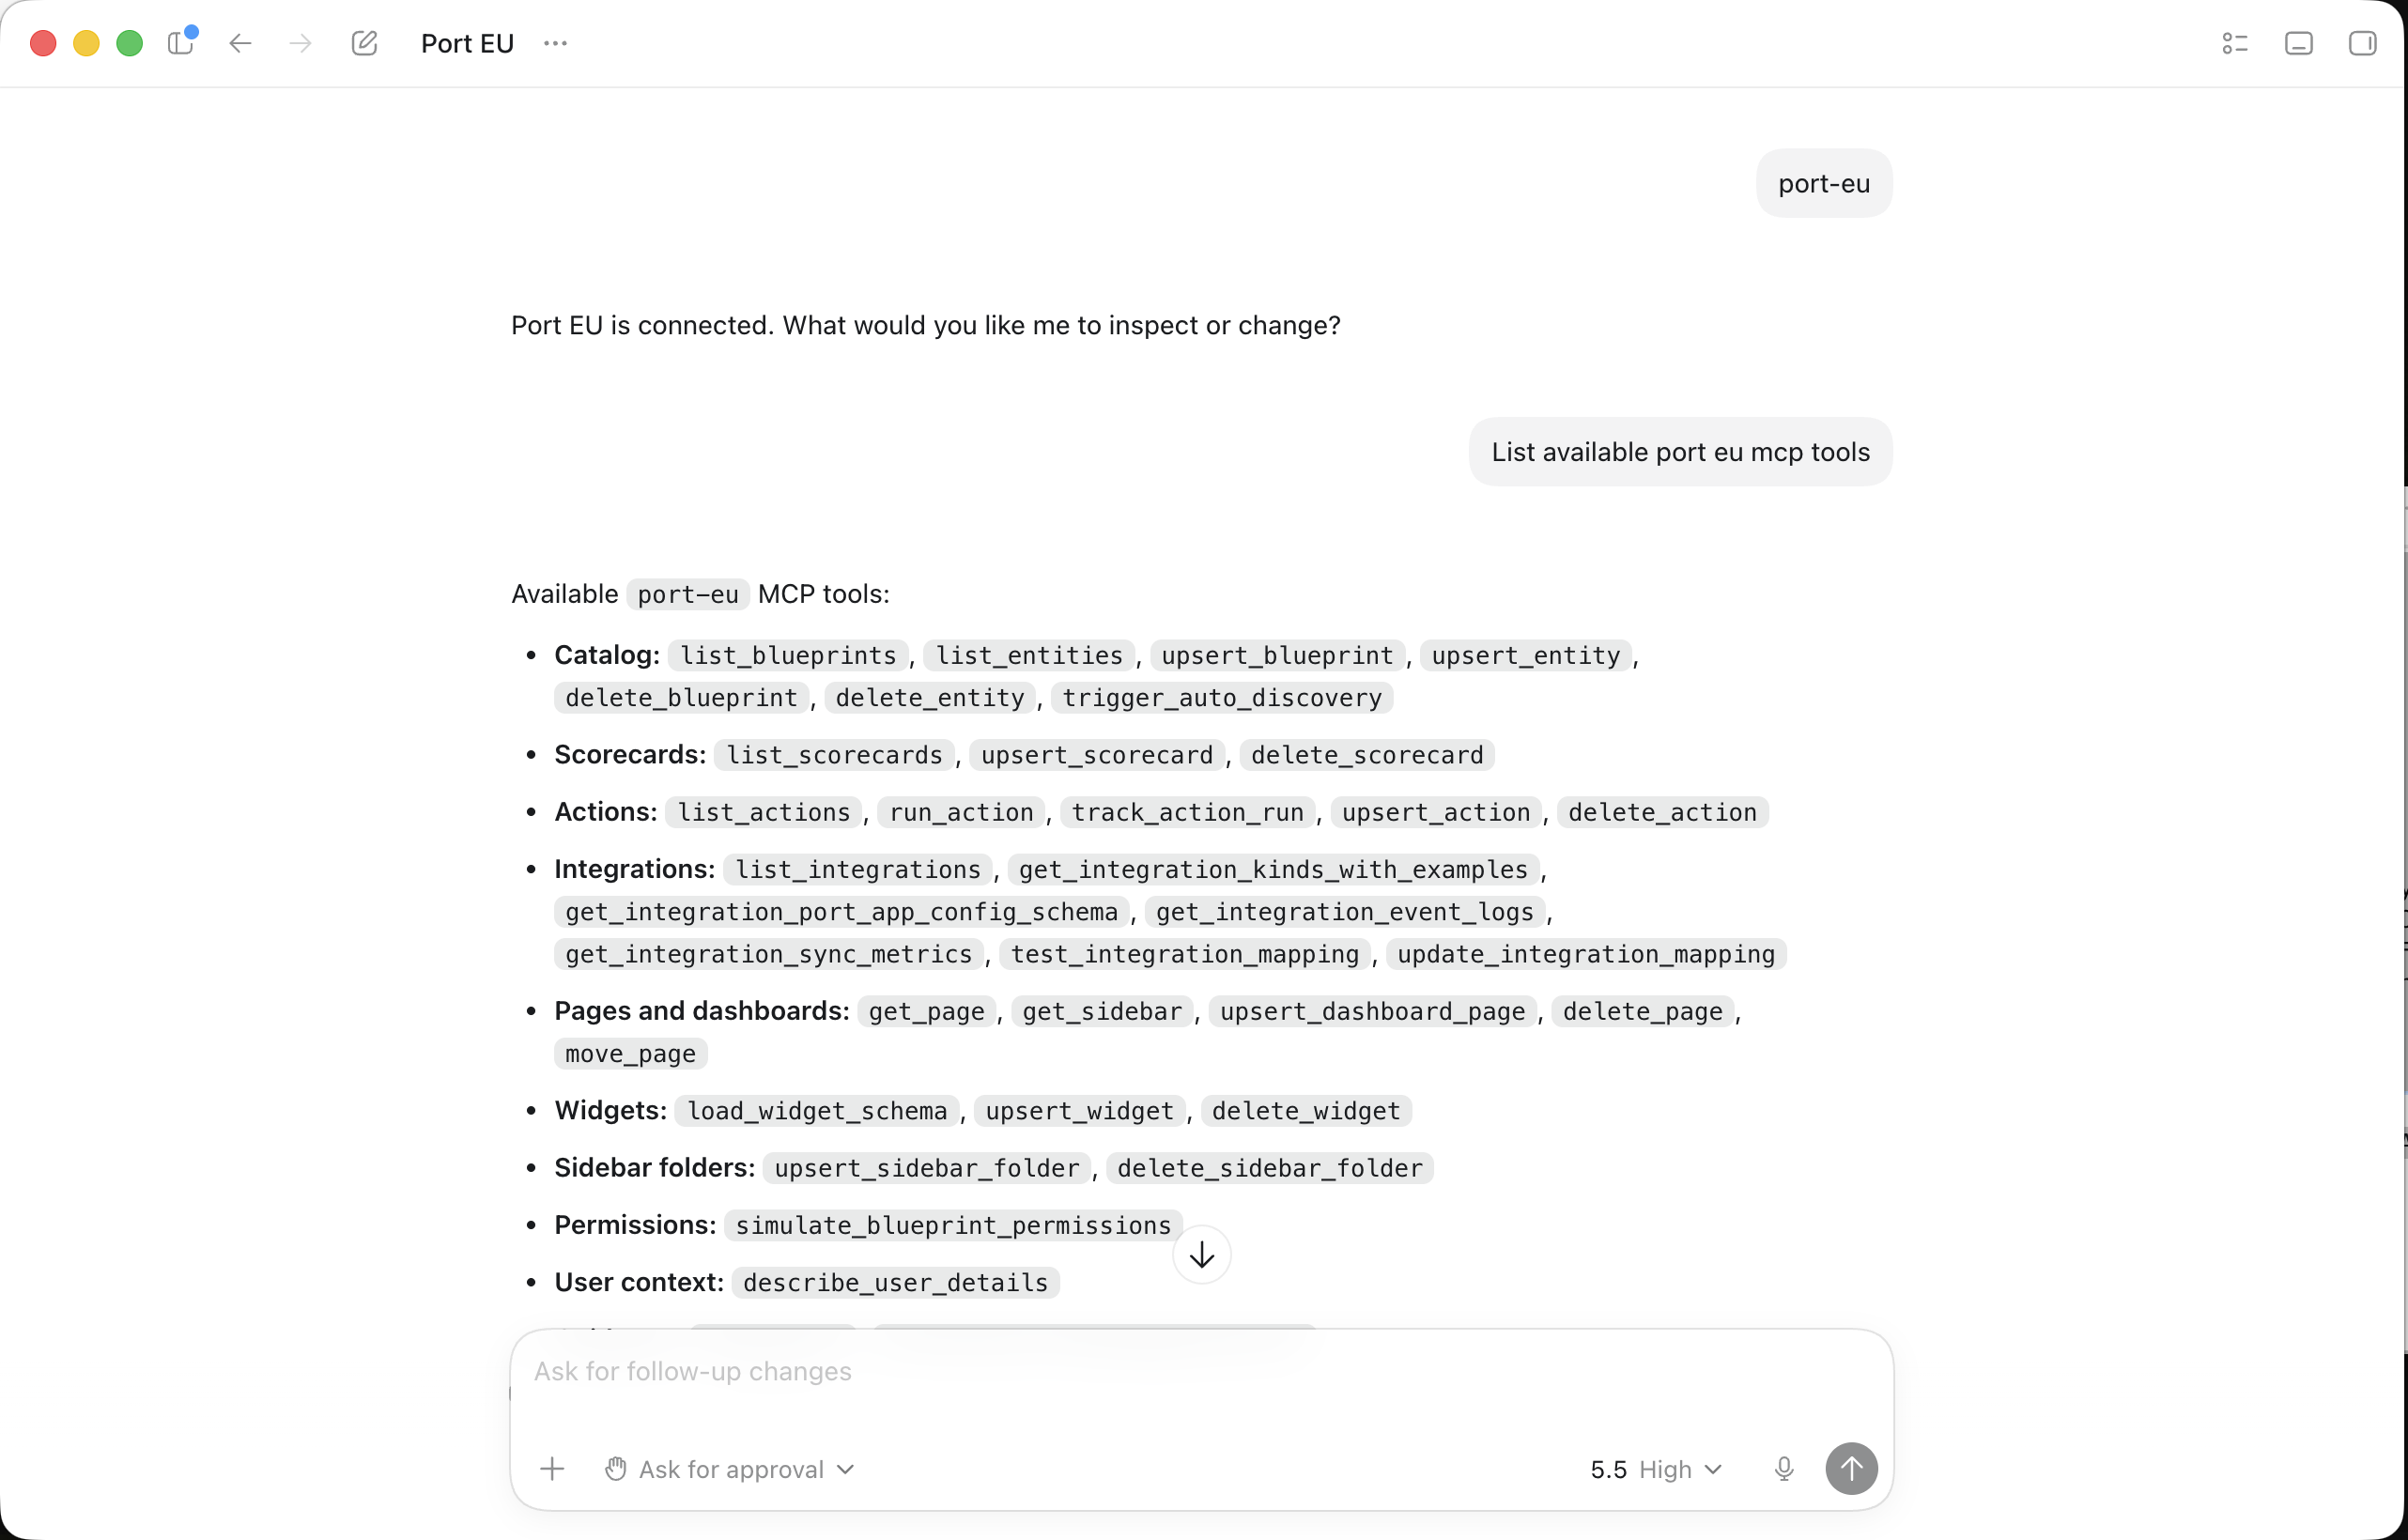
Start a Codex session and run /mcp and type port-eu or port-us to verify that the Port MCP server is connected and showing its tools.
Step 6: Query Port through Codex
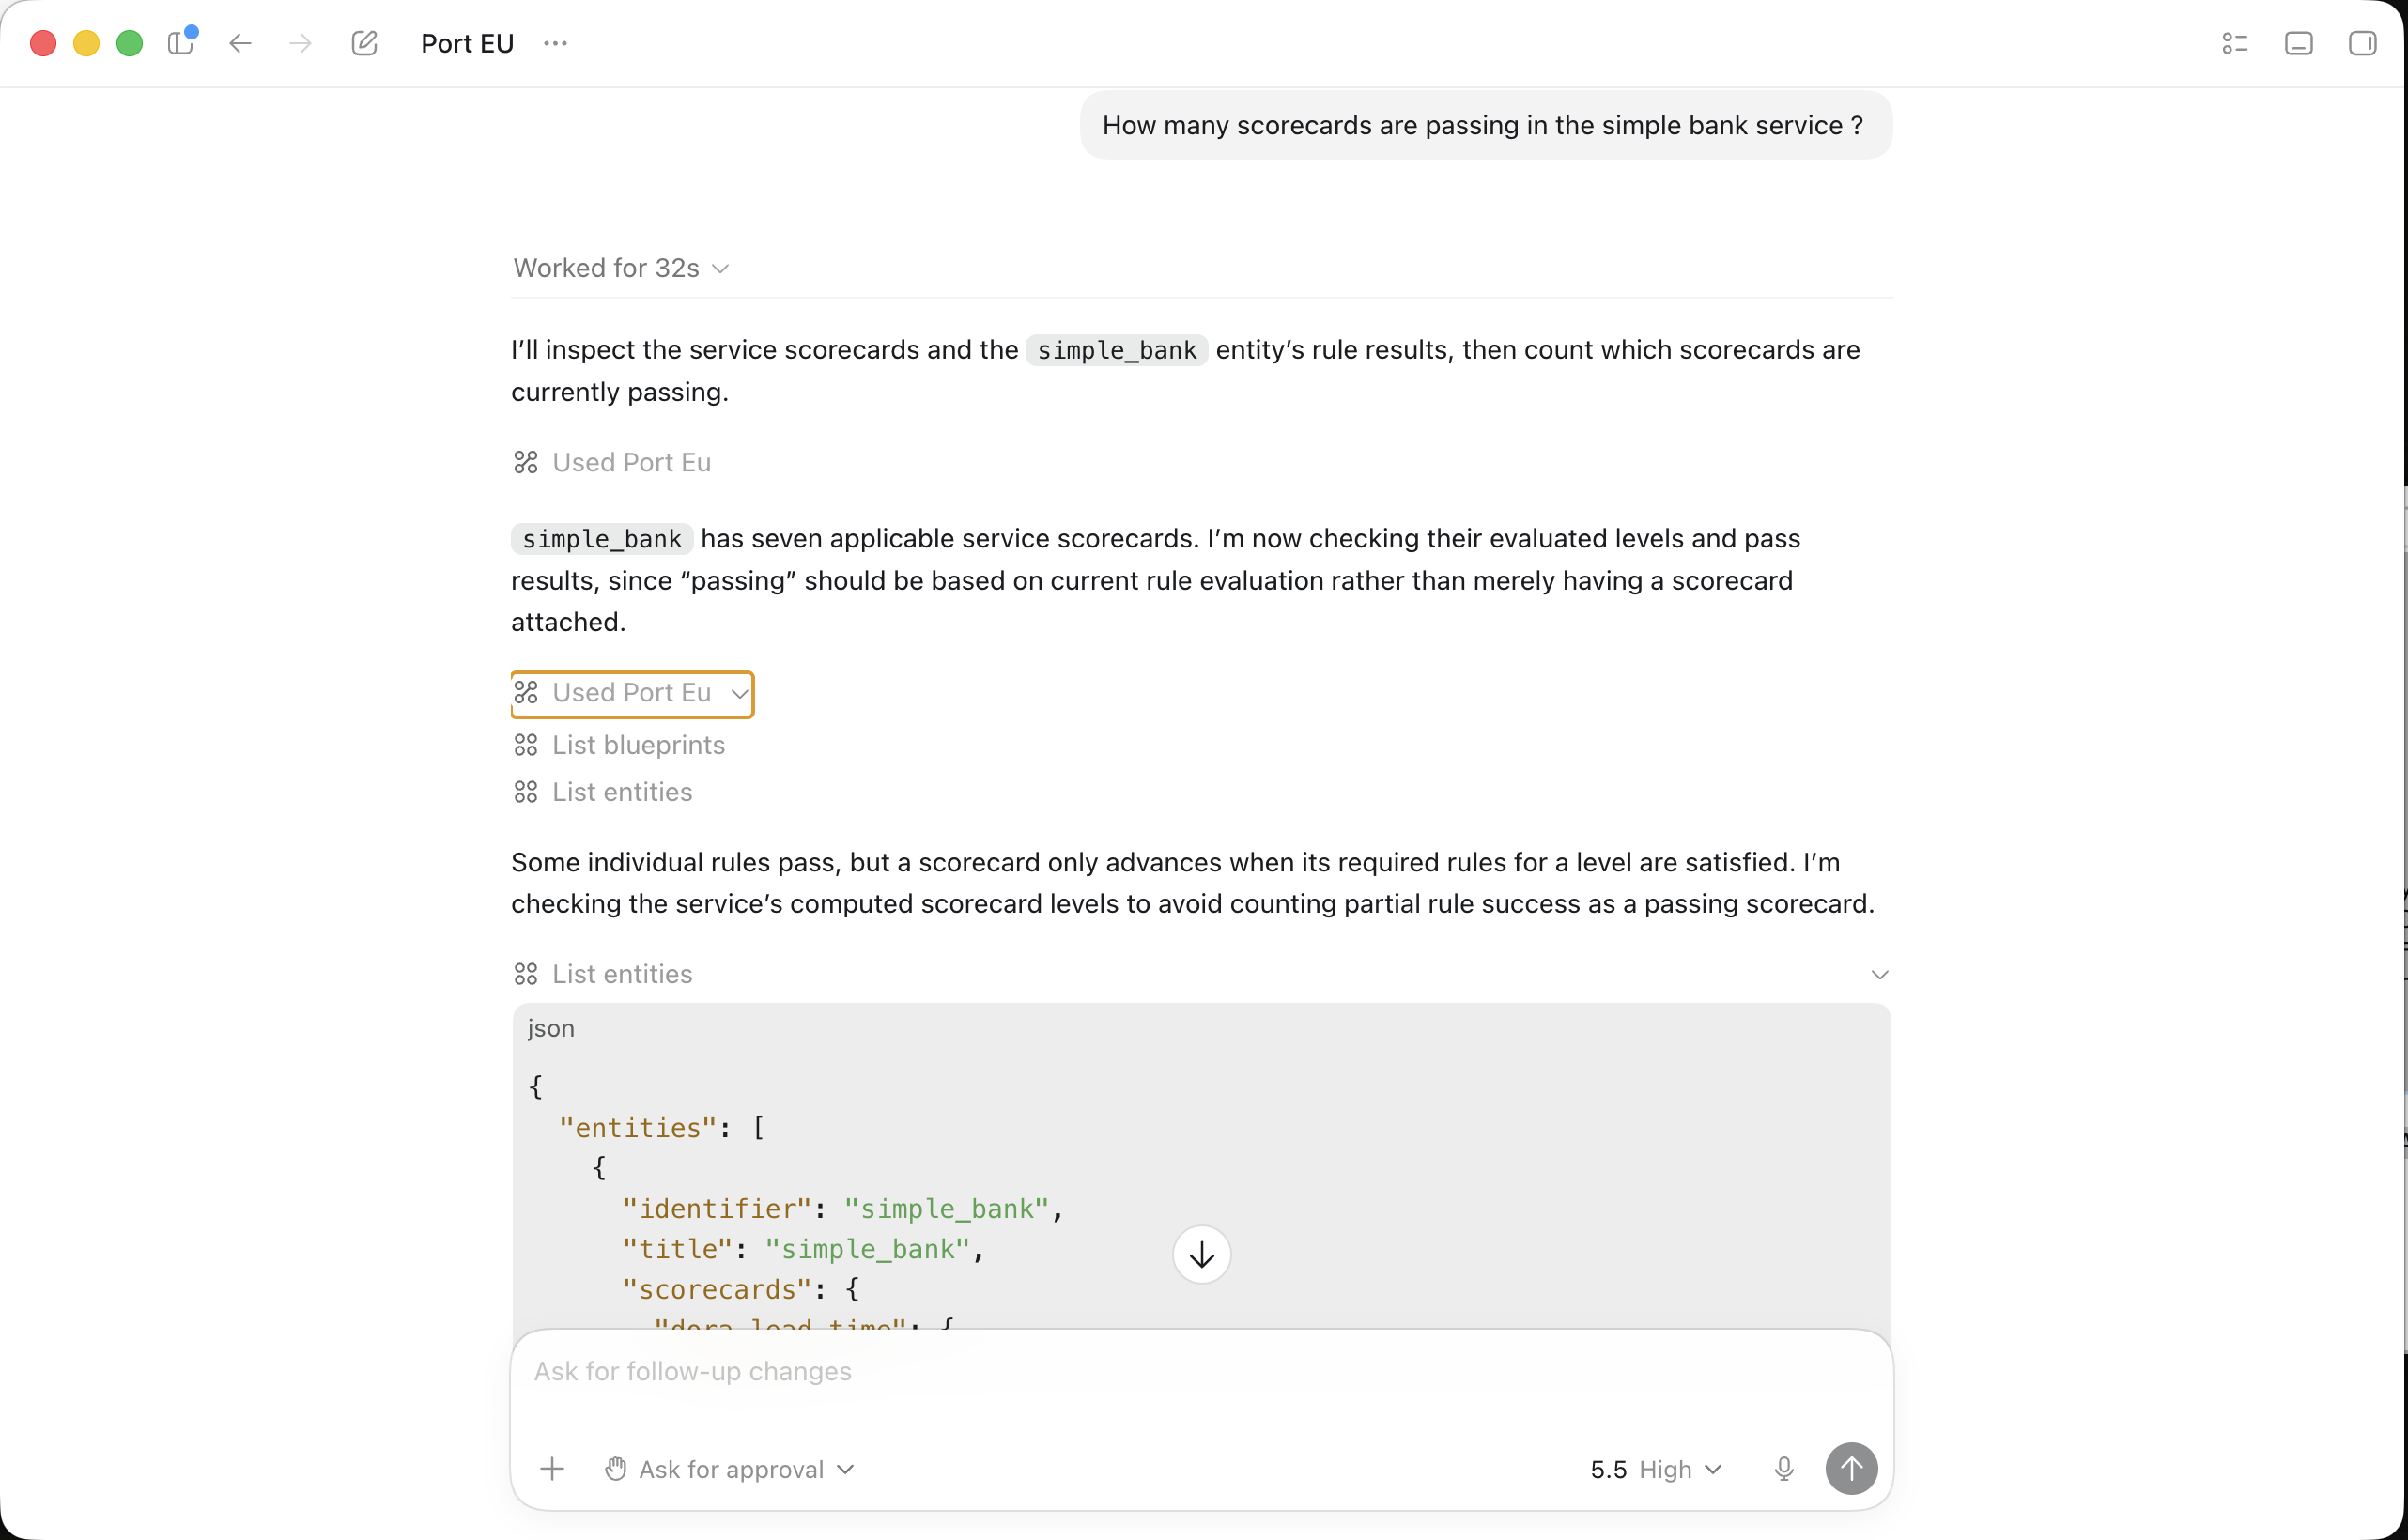
Once connected, you can interact with your Port catalog using natural language. Codex will automatically use the Port MCP tools to fulfill your requests. Try these example prompts:
- "Show me all services owned by the backend team"
- "What scorecards are failing for my production services?"
- "Who is the owner of the payments service?"
Optional: Configure Codex manually
You can also add the MCP server directly to your ~/.codex/config.toml file:
[mcp_servers.port-eu]
url = "https://mcp.port.io/v1"
enabled = true
If your Port organization is in the US region, replace port-eu and https://mcp.port.io/v1 with port-us and https://mcp.us.port.io/v1.
After editing the file, run the matching codex mcp login command from step 4.
You can restrict Codex to read-only Port tools by adding the x-read-only-mode header to your Codex MCP configuration. See the MCP server headers section for the full configuration.
Test your setup
Once Port MCP is configured in Cursor, test the onboarding workflow with the queries below.
Start a new chat session
- Open a new chat session in Cursor (
Cmd/Ctrl + L). - Confirm Port tools appear in the tools panel.
- Start your conversation with onboarding queries.
Example onboarding queries
Here are practical queries you can use to validate that the skill is pulling from your connected Notion and Port content.
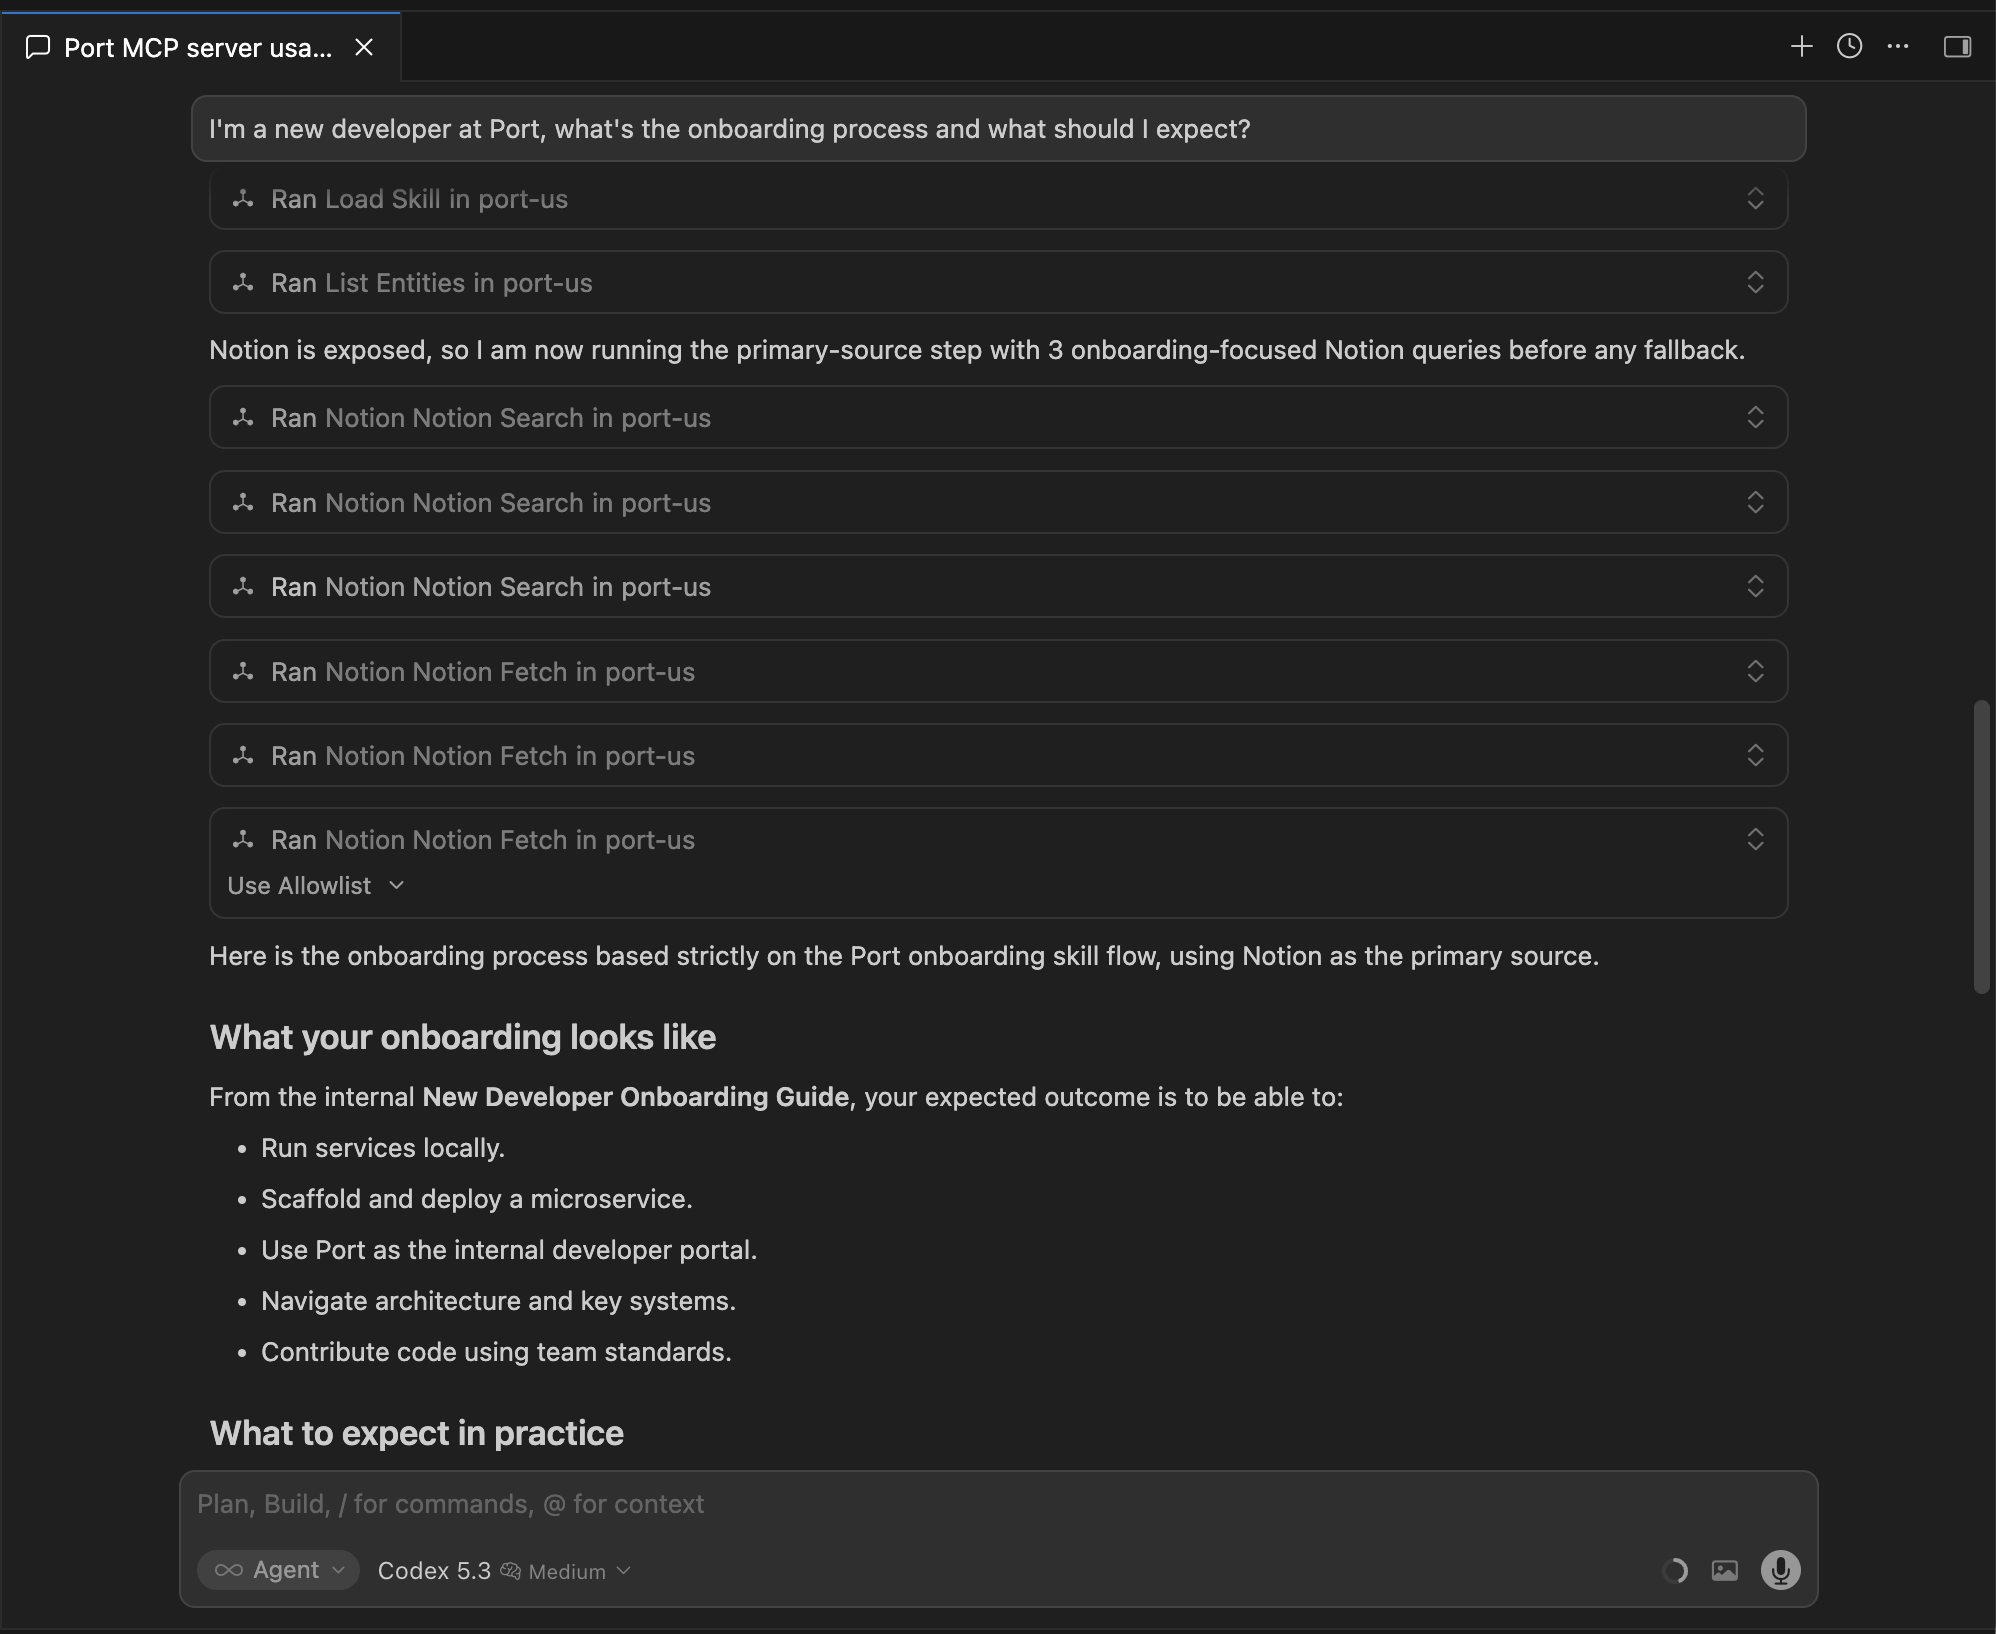
Ask:
"I'm a new developer — what's the onboarding process and what should I do first?"
Expected result:
-
The response should pull from your Developer onboarding guides in Notion.
Ask:
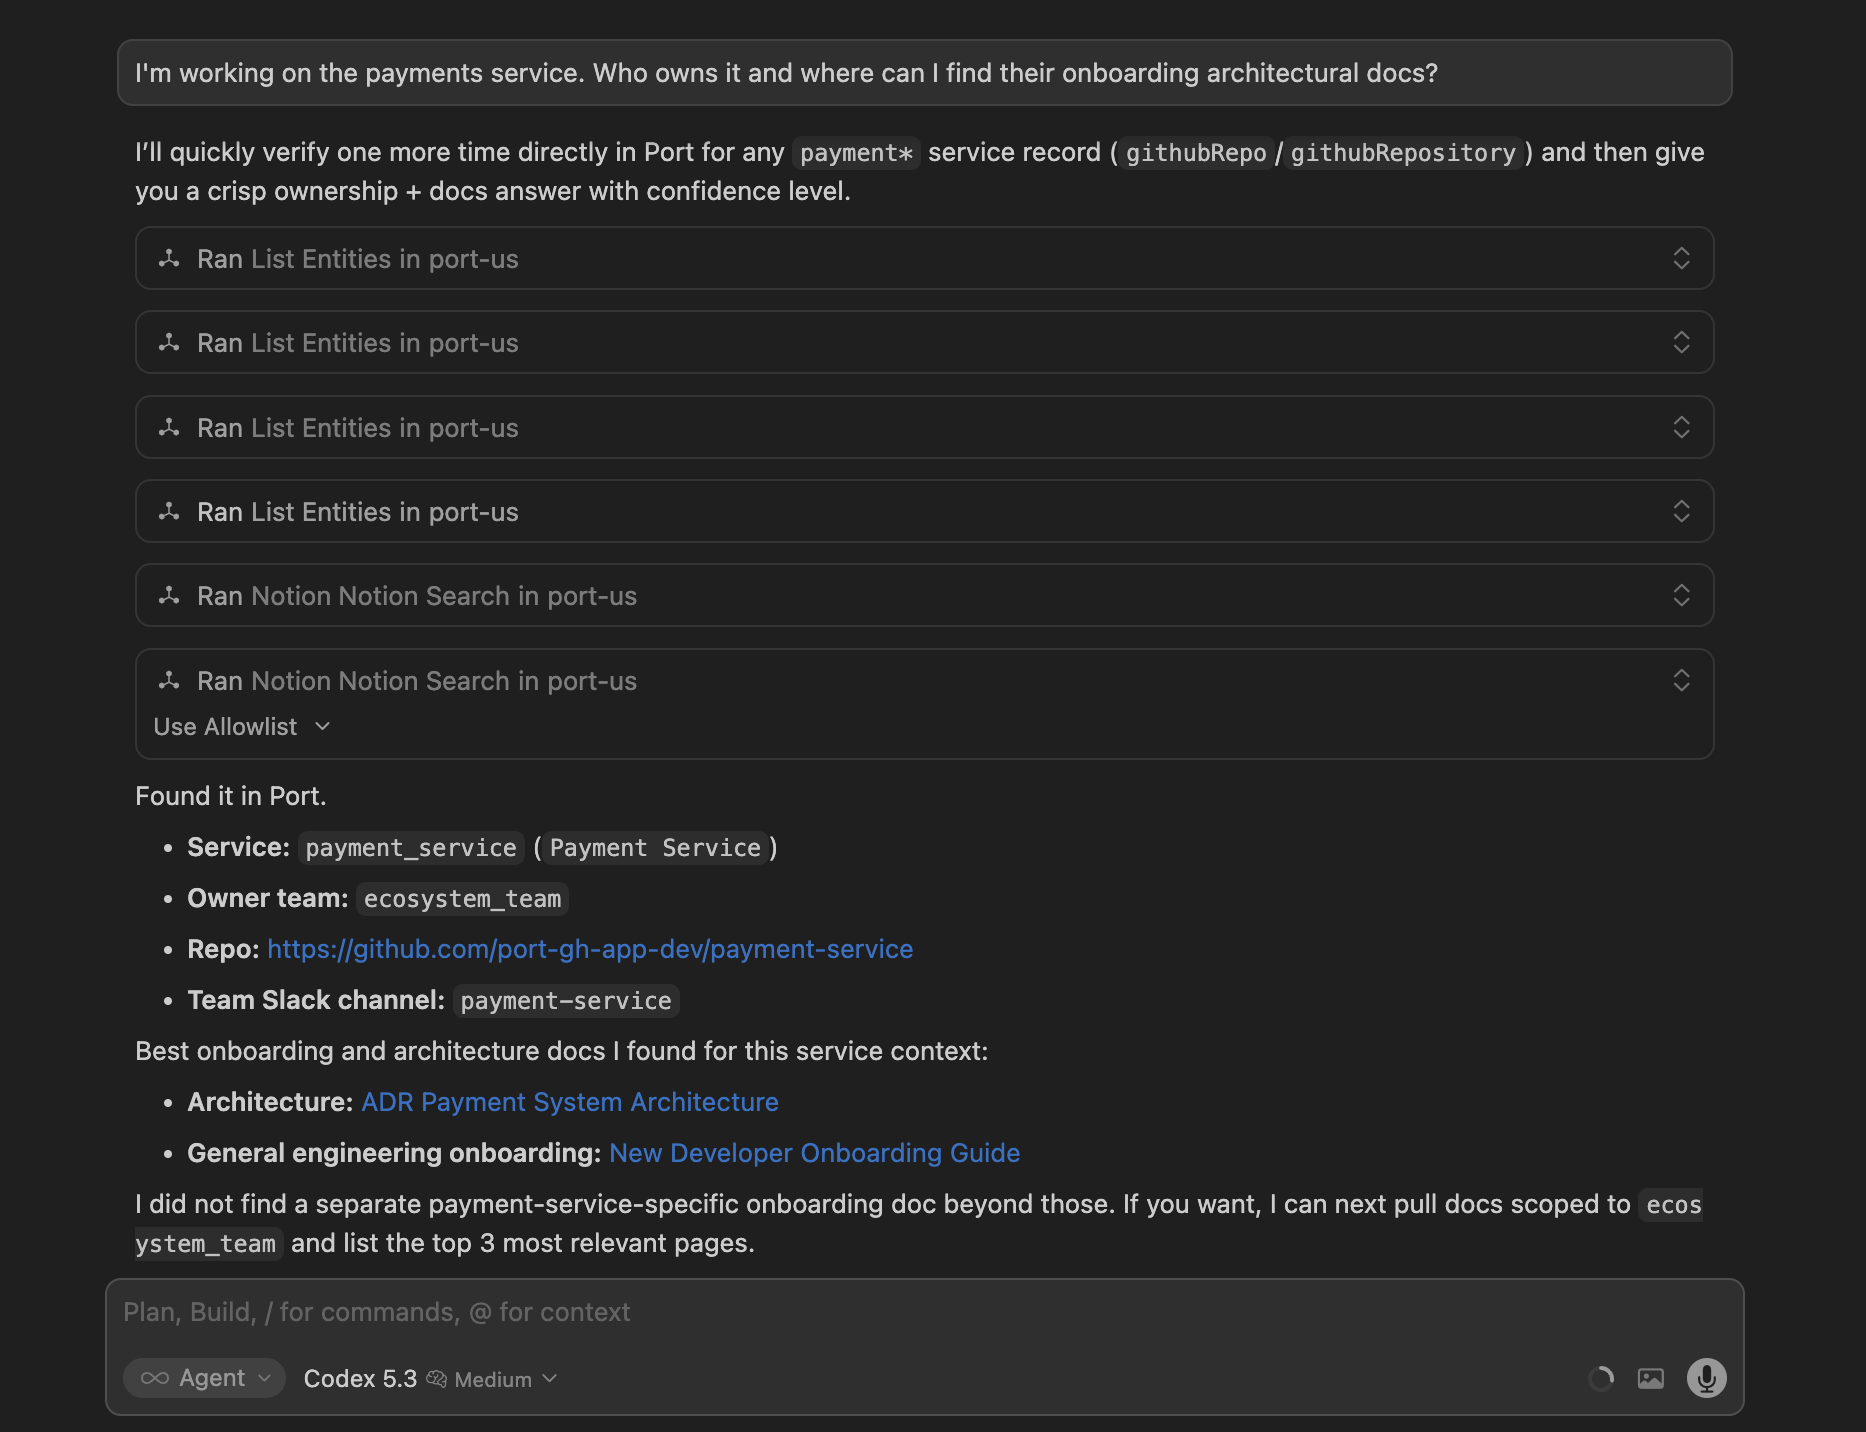
"I'm working on the payments service. Who owns it and where can I find their onboarding architectural docs?"
Expected result:
-
The response should include service metadata from Port's context lake. It should also surface your Architecture decision records page in Notion and reference the relevant ADR entries, such as the decision to adopt Port MCP Connectors as the approved AI gateway.
What to check
- Every answer is grounded in your Notion pages and Port Context Lake - not generic AI responses.
- The assistant references specific content from your internal docs (ADR numbers, tool names, exact steps).
- The assistant does not invent internal processes, links, or tooling that is not in your sources.
- If a topic is not covered in any connected source, the assistant says so and suggests where to look next.