External interfaces
Port already gives you more than one way to work with your organization's context lake, starting with the Port web app itself: pages, dashboards, and widgets like plugins, which you host inside Port.
External interfaces extend this flexibility: your own app, hosted outside Port, reading and acting on that data as the person using it.
Why build on Port
External interfaces let you bring Port into your own systems, surfacing context lake data, triggering workflows, and calling other Port tools from an app you build and control. That's also useful when you want to visualize your context lake in a way Port's own interface doesn't cover today, a different look and feel, or an experience embedded inside another product. Either way, it runs on Port's agentic SDLC platform, with the same governance and access already in place.
What you can build
External interfaces allow you to design targeted, custom applications tailored to specific operational needs. Here are a few examples:
- Incident command hub: a mobile-friendly dashboard for on-call responders and executives, showing only the affected services and their remediation triggers. Clicking one triggers a Port workflow directly, multi-step incident response, approvals, even an AI agent's diagnosis, scoped to what that person is allowed to do in Port.
- Self-service kiosk: a kiosk for requesting sandboxes, databases, or software licenses through a form built exactly to your team's process. Submitting it triggers a Port workflow, provisioning, approvals, catalog updates, under the requester's own identity.
How access works
An OAuth app belongs to the Port organization it was created in and can't read or act in any other organization, even one the same admin manages.
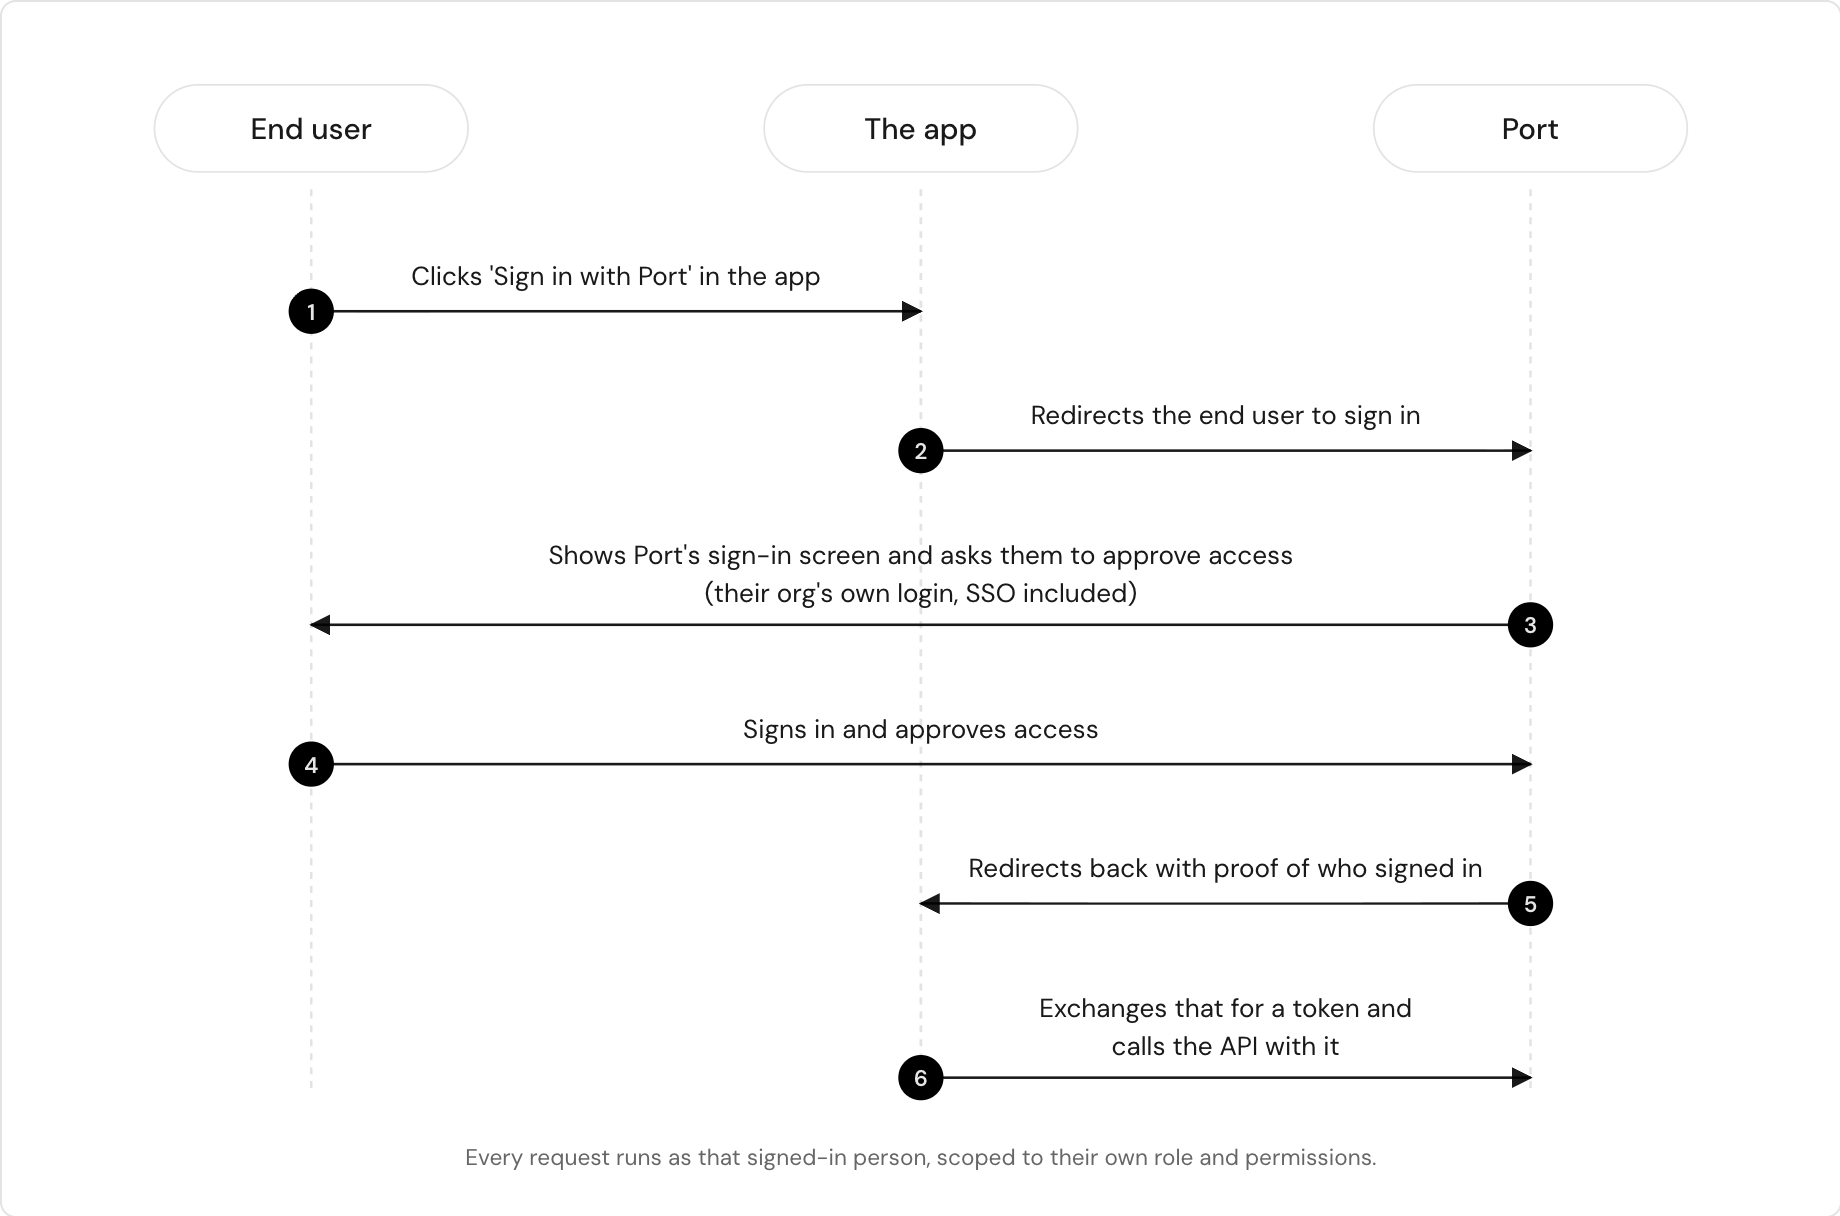
A person signing into your app goes through Port's own authentication, including SSO if your organization has it configured, and approves access on Port's consent screen. Port then issues your app a token scoped to that person alone. The token can do only what that person could already do by signing into Port directly: the same roles, the same permissions, the same data scoping. You don't reimplement access control or governance in your app, Port enforces it on every request.
An OAuth app is not the same as the client ID and secret under Credentials, which create an access token tied to your whole organization. An OAuth app instead signs in as a specific person: every action it takes carries that person's own role and permissions, not a shared service identity.
Getting started
1. Connect Port MCP
Connect the Port MCP server to your IDE or vibe coding tool (Lovable, v0, Bolt, or similar).
2. Add sign-in with Port, in one prompt
Ask it:
Create an app that authenticates with Port.
Behind the scenes, this registers an OAuth app for you and wires up sign-in, so anyone who logs in through it gets access to your organization's data, in their own role. Prefer to set up the OAuth app yourself first? See Manage your OAuth apps.
3. Build on top of Port
Once sign-in works, specify what you want the app to do: read from the context lake, trigger workflows, or use any existing Port capability. For example:
Build a chat assistant that helps my team mitigate incidents in real time, using Port's context lake to pull in affected services, and can trigger our coding agent with the right context when I ask it to.
From here, your app can read Port's context lake and call workflows exactly as that signed-in user could from Port itself.
Implement sign-in manually
Not following steps 1-3 with an AI agent? Once you have a client ID and redirect URI (see Manage your OAuth apps), the flow is the standard OAuth 2.0 authorization code flow:
- When someone clicks Sign in with Port in your app, redirect them to Port's authorization URL with your
client_id,redirect_uri, and the scopes you need. - Port shows its own sign-in screen (including SSO, if your organization has it configured), then asks the person to approve access to your app.
- Port redirects back to your
redirect_uriwith an authorization code. - Your app exchanges that code, along with your
client_id, for an access token at Port's token endpoint. - Call the Port API with that access token. Every request runs as that signed-in person, scoped to their own role and permissions.